Craft a Nature Sailboat
Let's catch the wind! The wind is air in motion: it can keep a kite high in the sky and push a boat across the water. Help your child explore the concept of wind with their very own DIY sailboat.
Materials
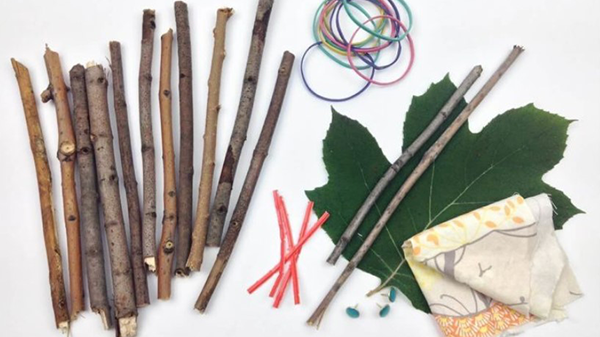
- 11 sticks, all about 9 inches long and the same thickness
- 1 thin stick, about 7 inches long
- 1 thin, short stick, about 4 inches long
- Rubber bands
- Twist ties
- Safety scissors
- Waterproof glue or three thumbtacks
- Large leaf or lightweight piece of fabric, such as a rag
- Twine
Directions
Remember to retrieve any human-made parts that may come loose while playing with your boat. Even something as small as a rubber band or twist tie can harm wildlife.
This craft comes to you from the creators of Nature Cat.
Iowa PBS STEAM Activities and Crafts provided by PBS KIDS Parents.
- First build the mast. Make a lowercase "t" shape with your two shorter sticks. Cross the 4-inch stick over the 7-inch stick about three inches from the top.
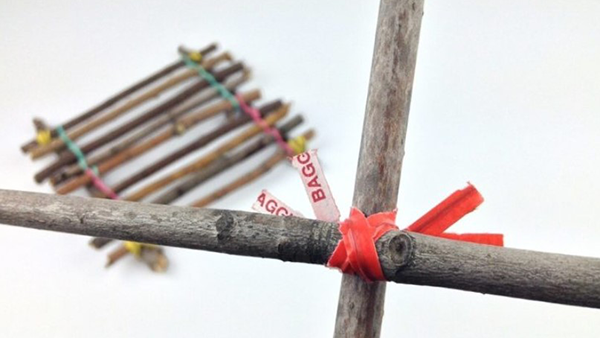
- Lay the twist ties in an "X" underneath the crossed sticks. There should be an even amount of the twist tie on each side of the sticks. Twist the ties together.

- You should now see an "X" made of the twist ties, crossed over your two sticks. (See photo above.) Repeat this step over the same sticks to keep them in place.
- To make the sail, find a large leaf outside or cut some fabric into a square shape. It should be about the same width as the stick running across and a little more than half of the length of the longer stick.
- Attach your sail with the waterproof glue across the "t" or place a thumbtack near the top and on either side of the stick. Set aside.
- To make the base of your boat, gather your rubber bands and sticks. Use the rubber bands to attach the sticks to each other.

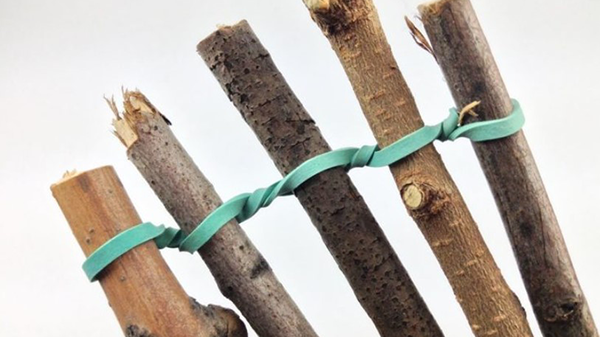
- Place one of your long sticks through a rubber band. Twist the remaining piece of rubber band twice so the stick feels secure. Insert another long stick into the empty loop of the same rubber band and twist twice. Repeat with long sticks until you have at least five joined together and the rubber band feels secure.

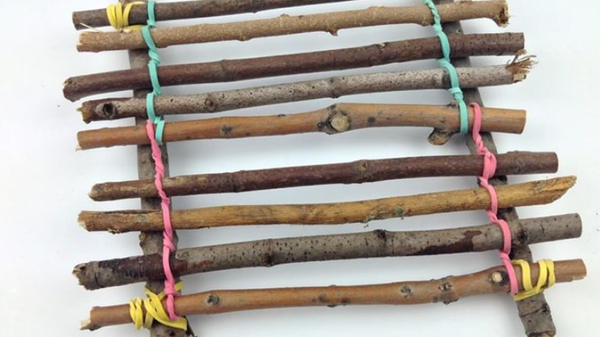
- Repeat step 7 on the opposite side of the sticks. Make sure they are joined together and can lay flat.
- Make another bundle with four sticks joining the sticks on both ends. This time, loop an extra rubber band around the last stick.

- Lay the bundles next to each other using the extra rubber band you just looped and connect the two bundles together.
- To finish the base of your boat, take your two remaining long sticks and lay them vertically. Place the connected sticks horizontally over them. Using twist ties, tie the corners of your boat base to the tops and bottoms of the two sticks beneath them.
- Use the twist ties and attach the mast to your first stick at the front of your raft. The tiller (the part that extends below the bed of the raft) should be attached to the middle of the stick.
- Tie a long piece of twine to the bottom of the tiller. (This will help you steer — and not lose your boat!)
Remember to retrieve any human-made parts that may come loose while playing with your boat. Even something as small as a rubber band or twist tie can harm wildlife.
This craft comes to you from the creators of Nature Cat.
Iowa PBS STEAM Activities and Crafts provided by PBS KIDS Parents.
